Set Up Your Program
Configure your affiliate program and choose the right integration path.
Last updated Oct 15, 2026
Complete these steps before you invite partners or install tracking.
What you are setting up
- Program details: business info, approval settings, commission rules
- Tracking & integrations: click, signup, and sale tracking
- Go live: publish the program once payments are connected
- Share program: your partner-facing program link
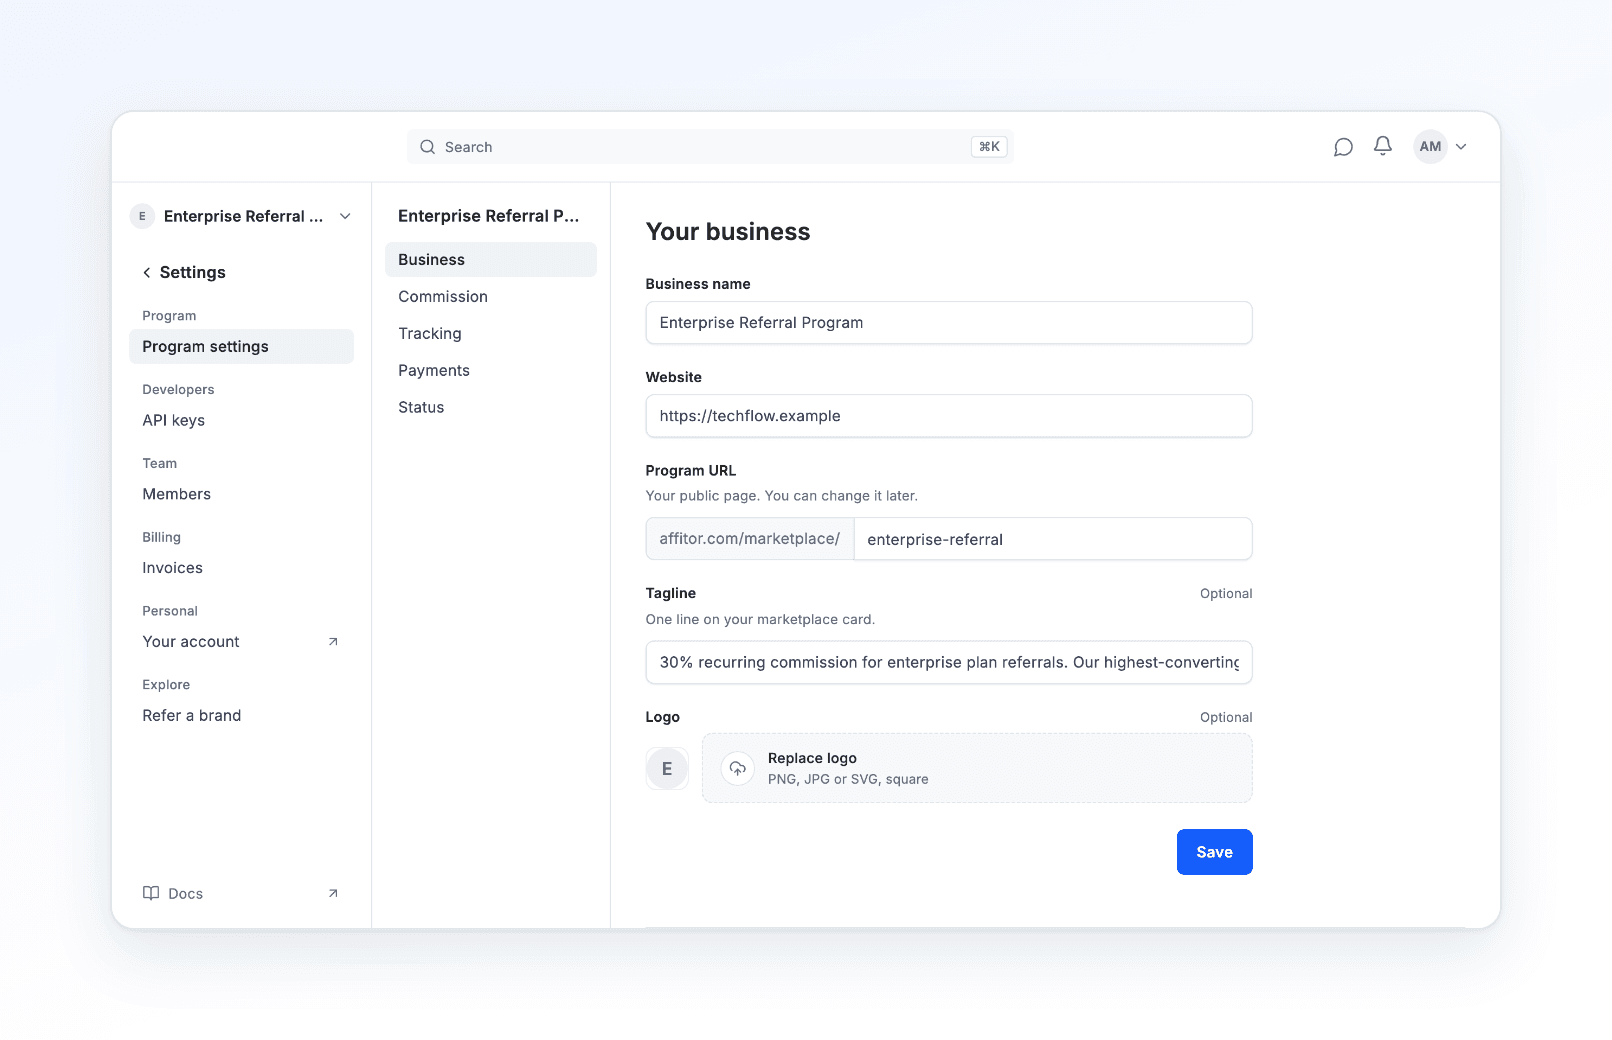
1. Program details
Business details
| Field | Required | Notes |
|---|---|---|
| Company name | Yes | pre-filled from your account |
| Website URL | Yes | main product/site URL |
| Tagline | No | shown to partners |
| Logo | No | PNG, JPG, or SVG; until you add one, the marketplace shows your program's initial |
| Terms of Service URL | No | affiliate terms / program terms |
| Resources URL | No | partner-facing marketing resources |
Approval mode
| Mode | Description | Best for |
|---|---|---|
| Review each | review each partner application | quality control, B2B motions |
| Approve all | approve applicants automatically | higher-volume programs |
Commission details
| Field | Description |
|---|---|
| Commission rate (%) | default partner commission |
| Commission duration | how long a referred customer keeps earning for the partner |
Common options: one-time, fixed-month recurring, or lifetime.
2. Tracking & Integrations
Set up tracking in three steps: clicks, signups, then payments.
Step 1 — Pageview / click tracking
Install the tracker on pages where affiliate traffic lands.
SDK:
npm install @affitor/sdk// app/providers.tsx — client component
'use client';
import { useEffect } from 'react';
import { loadAffitor } from '@affitor/sdk';
export function AffitorInit() {
useEffect(() => { loadAffitor('YOUR_PROGRAM_ID'); }, []);
return null;
}
// render <AffitorInit /> once in app/layout.tsxScript tag:
<script
  src="https://api.affitor.com/js/affitor-tracker.js"
  data-affitor-program-id="YOUR_PROGRAM_ID"
  data-affitor-debug="false">
</script>Step 2 — Signup / lead tracking
After signup succeeds, send your internal customer ID to Affitor.
Browser helper:
await window.affitor.signup('user_123', 'user@example.com');By default a browser-only lead is provisional: it counts once your server sends the lead (below) or a Stripe Checkout payment for that customer arrives through your connected Stripe account.
Server API:
{
  "click_id": "cust_42_1234567890",
  "customer_key": "user_123",
  "email": "user@example.com"
}Step 3 — Sale / payment tracking
Choose the path that matches your checkout.
| Method | How it works | Best for |
|---|---|---|
| Server-side tracking | your backend sends POST /api/v1/track/sale after payment succeeds | any payment provider or custom backend |
| Stripe integration | you keep taking payment in your own Stripe checkout; Affitor attributes via metadata + webhooks | existing Stripe Checkout integrations |
For Stripe integration, use these public fields in metadata:
affitor_click_idaffitor_customer_keyprogram_id
For subscriptions, put the same values in both:
metadatasubscription_data.metadata
3. Go live
Go live publishes your program on the marketplace and lets you invite partners. It needs three things:
| Requirement | Done when |
|---|---|
| Business details | the program has a name and a website URL (the logo is optional) |
| Commission | a default commission is set |
| Payments | Affitor can record your sales (see below) |
Payments counts as connected in one of two ways, matching the method you chose on the Payments step:
- Stripe: your Stripe account is connected to the program.
- Server API: your server has sent at least one sale for this program to
POST /api/v1/track/sale. A test sale counts (send it with"livemode": false), so you can go live before your first real customer. The Payments step waits for that sale and says when it reached Affitor. The dashboard's Run check (Check Affitor's tracking) is a pipeline check and does not count; the sale has to come from your server.
Click and signup tracking are not required to go live. Install them before you invite partners so their traffic is attributed.
If the program is paused for an overdue invoice, pay the invoice first; Go live stays blocked until then.
4. Share Your Program
Once the program is live, share your partner recruitment link so affiliates can apply.
Recommended setup order
- Install click tracking first
- Wire signup tracking with a stable internal customer ID
- Choose Server-side tracking or Stripe integration for payment tracking
- Run test flows before launch
Verify it worked
Reload Settings and confirm each choice survived the save. Each page (Business, Commission) saves on its own:
- Settings → Business shows your company name, website URL, and logo
- Settings → Commission shows your rate and duration, and Approve all or Review each, whichever you picked
- Until the program is live, Quick start in the top bar shows how many setup steps are left
- A page shows old values? Each page saves on its own: reopen it, re-enter, and save that page again
- Set up with the CLI instead? Run npx affitor status from your project root — it prints your program card (name, domain, Program ID) plus Stripe state, and should match what Settings shows
- Tracking steps still show as pending? That's expected — integration status is recalculated from real click, lead, and payment events, which you'll send in the tracking quickstart next